Final Class Project wk5 สั่งงานอุปกรณ์ผ่าน Google Assistant (Part2 firebase บนคอม)
- Phurin

- May 2, 2020
- 1 min read
#ESP32-CAM #ระบบอ่านค่ามิเตอร์จากระยะไกล#Google Assistant #Firebase
ในขั้นตอนนี้เราจะติดตั้ง firebase บนคอมกันโดยสามารถดูรายละเอียดเพิ่มเติมได้ ที่นี่
1.เรียก "Command Prompt" ขึ้นมา จากช่องค้นหาใน window 10 จากนั้น cd ไปยังโฟลเดอร์ที่ต้องการสร้าง function จะถูกสร้างตาม path ที่เราเข้า ในที่นี้คือ C:\User\Desete

2.พิมพ์ command เพื่อติดตั้ง firebase "npm install -g firebase-tools" รอจนกว่าจะเสร็จ

3.พิมพ์ command เพื่อติดตั้ง firebase "firebase login"

4.พิมพ์ command เพื่อติดตั้ง firebase "firebase init function" ระบบจะถามว่าคุณไหมพิมพ์ "Y" แล้วกด"Enter" ต่อจากนั้นให้เลือก option "Use an existing project" คือเราจะเลือกโปรเจคที่สร้างไว้แล้วบนเว็บ

5.ในหน้านี้เราจะเห็นโปรเจคที่สร้างไว้ในที่นี้เลือก "captureesp32cam (CaptureESP32Cam)" ตามที่สร้างไว้ก่อนหน้า

6.เลือกภาษา "JavaScript"

7.เลือก "ํY" มาเรื่อย ๆ จะขึ้น "Firebase initialization complete!" ดังรูป

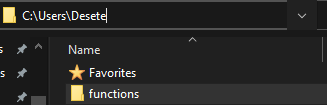
8.จากนั้นไปดูในโฟลเดอร์ที่เลือกไว้จะเห็นโฟลเดอร์ "functions" ปรากฎขึ้นมา
9.เข้าไปในโฟลเดอร์ "functions" แก้ไขไฟล์ "index.js" ตามนี้ หรือตามต้องการเมื่อเสร็จกด Save
const functions = require('firebase-functions');
var admin = require('firebase-admin');
admin.initializeApp(functions.config().firebase);
var database=admin.database();

 exports.hello = functions.https.onRequest(async (request, response) => {
  let params = request.body.queryResult.parameters;
  database.ref().set(params);
  response.send({fulfillmentText:"โอเค กำลังถ่ายภาพ"});
 });
10.กลับไปที่หน้าต่าง "Command Prompt" พิมพ์ command "firebase deploy"จนเสร็จดังรูป
ในขั้นตอนนี้เราจะได้ URL เพื่อนำไปใช้ใน dialogflow ต่อไป

11.สามารถเข้าไปตรวจสอบบนเว็บ firebase จะได้ดังรูป

ต่อ Part3
อ้างอิง https://youtu.be/LAkCc1VPXco,https://firebase.google.com/docs/functions/get-started


Comments